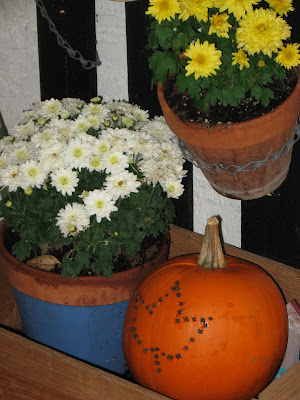
Fall Clove Pumpkin
I saw this idea in a magazine a few years ago. But when I went to look for the actual instructions.... they were no where to be found. So I had to do the best I could with my memory.
Start with a pumpkin and some whole cloves. You will need a tool to poke holes in the outside of the pumpkin. I used a nut picker (you know the one that is used when you crack a nut and have to fish the flesh out.)
I just poked some holes in the shape of a leaf ( a little sad, I will admit, but it was my attempt at a leaf). Then I inserted the cloves into the holes.
That is it!
I set my pumpkin out on my front porch with my flowers. It creates a lovely spot of color.
Party- butterfly Pinata
A few year ago, my Beauty Girl wanted a pinata at her Birhtday Party. Well I just could not spend the money on the one she wanted ($18 plus). I thought, I can make that!
Well I did make it and it was perfect!
The girls loved swinging at the thing and had a grand time diving after the candy as it fell!
There is a word of caution to this tale. Unless the Pinata needs to match your birthday theme exactly, it would have been better to just buy the thing! The supplies were cheep, but the labor was intensive! The moral of this tale is Lots of time, no money...This is the answer! No time, some money... Just buy it!
Lets Play House
OK... It is a little uncanny that one of my sisters and I are so similar. Well, here is yet another example of this! I had drawn up plans for a PVC play house for my Beauty Girl a few years ago. And what to my wondering eyes should appear but a completed project of a pvc house on HER blog! Anyway, it got me all inspired to actually put my plans into action. I did look at the plans she used, which were almost the same as mine, but I added a door to the front. (My Beauty Girl is a tad accident prone and would have tripped over the pvc pipe in the entrance.) And for the sides, I put in holes for windows. This is two fold, One there is better ventilation and the breezes do not tear apart the whole thing. Two, I can check up on play more easily. That is my job as the MOM.
I also recycled! I used left over pvc from my Dad and used old sheets that were going to be donated. But viola, I found a use for them. I attached hook and loop (Velcro) to the walls and sides for easy removal of the walls. This is an outside thing you know (but it is under the back porch). For the top, I used a queen sized fitted sheet. I just popped it on and there it is! I did have to buy the connection pieces and one more piece of pipe. I think I spent around $15-$20.
We did put a few other things in there. An old spool for wire was painted pink and is now a table. There is a tin mail box (painted pink) outside the door. Also, an indoor-outdoor rug is under the house. That is just to make it a little nicer for my Beauty Girl!
Take a look. Tell me what you think!
Subscribe to:
Posts (Atom)