Pipe Dreams


The other day, I walked out side to discover that my Beautygirl had been constructing......something.... Out of old pvc pipes. It was quite tall and very interesting.

Leave it to a young mind to find a way to enjoy a pile of unused pipes.
Ahh to be young, when everything has a new purpose.

Silver Lining

Every now and then, there truly is a silver lining to the dark clouds.

We were having a monsoon storm roll into Arizona, and I saw a the phrase "silver lining" right there in front of me in living color.


It was beautiful. I thought I'd share.

Organize a little girls room.....


This is the never ending project...."Lets organize your room"

My Beautygirl wants to keep absolutely everything that has ever passed through her hands. So we are working on a system to make her room more organized. (I can always dream)

This is the dresser. It is two small file cabinets that are metal.


We have attached tags made out of those lanolin samples. (No I did not steal them. I got them when I was working on a project for school.) A little magnet is glued to the back.


Hopefully, the tags will help the clothes go into the right home.


Also, we took down the huge rod in the closet.
It was warped in the middle. Instead we hung two towel rods from Ikea. We just placed them upside-down and screwed them into the wood shelf.


This way we could divide and conquer her stuff. School outfits on one side. Dresses, coats, etc... on the other.


On the top shelf, there are a few plastic file cubes. Of course we are not hanging files in them. One houses extra blankets and bedding. The other is home to dress-up clothes.


We did install a belt thingy...to hang the belts from.


We have a long way to go. We already did under-the-bed storage, which went really well. (If you want to see the under-the-bed storage, look for the label "luggage".)


So... What do you think?

Doll Clothes


My Beautygirl decided that we needed to make doll clothes for some of her dolls.

I did not have any patterns, so I suggested that we call grandma and see if she did.

I was thinking "quick trip".

--Go to grandmas
--get doll clothes pattern
--go home and begin project...


When I got to grandmas, she was already in the midst of one doll dress for another granddaughter. Grandma accused me of getting her involved in a NEW project. I told grandma what my plan was and then.... I discovered that my Beautygirl had set up a very different event. Little did I know that Beautygirl did not just call grandma, but she arranged that grandma would be making the doll clothes for other cousins at the same time. And Beautygirl had talked to the other cousins and told them the plan as well. It was to be a day! Not only that, but Beautygirl had brought some of her fabric scraps to make the doll dress.

She set up a project day at Grandmas--without my knowledge.

Hmmmm.....

So, this time, I figured "What the heck! I am already here."

This could be an opportunity to teach a little sewing.
I let Beautygirl design the dress.


I then made up a pattern (because after all that, the patterns at grandmas were WAY to complex for a doll dress)
I showed my Beautygirl how to pin the pattern to the fabric and how to cut it out.


Well, that was about all she could handle. (After all, she does have a hyper-focus issue that we deal with often)

So guess who made the rest of the dress? You got it...ME!


However, I did require Beautygirl to sew on the buttons.


In the end, The dress turned out pretty darn cute.

Soda Pop Tops


Storage...


I recently needed to be able to hang more things in my Beautygirls closet. I create outfits for school, so the torment of the morning routine is lessened. But! Problem....

How do I get the outfits to hang together. If I hang the skirts on the bar of the hanger, the shirt wrinkles and hides what is under it.


Here comes the awsome part! take a pop top and use it as a hanger connector. Cheep!!!! and the clothes hang like a dream.


Viola...

--Tara

When all the world is...HOT!

Oh... what do you do in the summer time, when all the world is hot!


We make ice cream.


--Take a little milk, half and half, cream and sugar...


--Put them in the blue smurf (tiny ice cream maker)


--Mix until it is mostly solid


--Pour into bowls


--Eat with feet in a play pool.


Aah... the world has been cooled for a little while.

The case of Mistaken Identity

All of these items have been mistaken for something they are not.

See how you do:

What is this?


If you guessed the first photo is mozzarella cheese: you would have guessed the same as my daughter.

The next photo looked like little balls of cookie dough (notice there is one missing in the bottom corner, you can see the remnant of a white ball stuck to the tin foil). My husband tasted one of these.

And the last photo? Did you guess milk?

All of these identities are mistaken! These are none other than a humble

bar of soap.

Did you guess Soap?

Magical Fire Starter

The perfect fire starter. Pine Cones!


I was looking for things to do with my nephews and niece when I went back east this last summer. I came across an "activity" of make your own fire starters.

Basically it is dry pine cones, covered in wax--(and a little salt while still sticky).

They work fantastic!


I took old candles that have a tunnel burned out of the center and melted them in a pot of hot water.


Then I poured the melted wax over the pine cones... and hurried... and sprinkled salt.


Don't they look like they have been frosted!


I just put one or two under the logs I am going to light (in the fire place). Strike a match and the magic begins.
I am not sure (exactly) why this works. It has something to do with the wax though. I think it gives the fire some staying power so it will actually burn the pine cones. What ever it is... It works!

Try it!

P.S. I did not actually get to make these with the little guys back east.

New? storage....Luggage

I am sick and tired of the storage "solutions" being damaged or just is not the right size....

Well. I have found a solution. I am taking luggage (solid) and painting them to fit my beauty girl's color scheme. Now we have Polly pocket storage, barbie storage, stuffed animal storage and art supply storage. And all of it fits under her bed. By having all of this luggage taking up all of the room, it helps keep other things from being shoved under the bed.
(After all, that is the meaning of cleaning your room. Push it under the bed and no body will be the wiser. Right?!)

Anyway. On to the process.

  • Find old luggage.

(I happened across this really nice set of Samsonite. The insides were in prime condition. a little wash and good as new.)


  • Lightly sand the out side shell.

(tape off anything you want to keep paint off of. I taped the handles and latches.)

  • use "good" spray paint. I used Krylon.

(several coats will be necessary. I should have primed the luggage first. Then I would have only used One can of the ballet slipper pink. But none the less, I did need two cans of paint for three pieces of luggage.)

Now for the cream. I could not find a crown to save my life and I did not want to have PLAIN luggage storage. It needs a little whimsy. I made a stencil out of laminating film. After I used a good sharp exacto knife and cut away the pieces that would show on the luggage, I taped the stencil into place. This is where I used a different color of paint. Bronze? I think was the color. But It goes great in her room. And Yes! I did have to cut out a second crown stencil because my first one was too big to fit on the train case (which houses the small Polly pocket dolls).

We have filled the suitcase storage and now have some great places to keep her stuff. UNDER the BED! Hooray!!!

Fall Clove Pumpkin


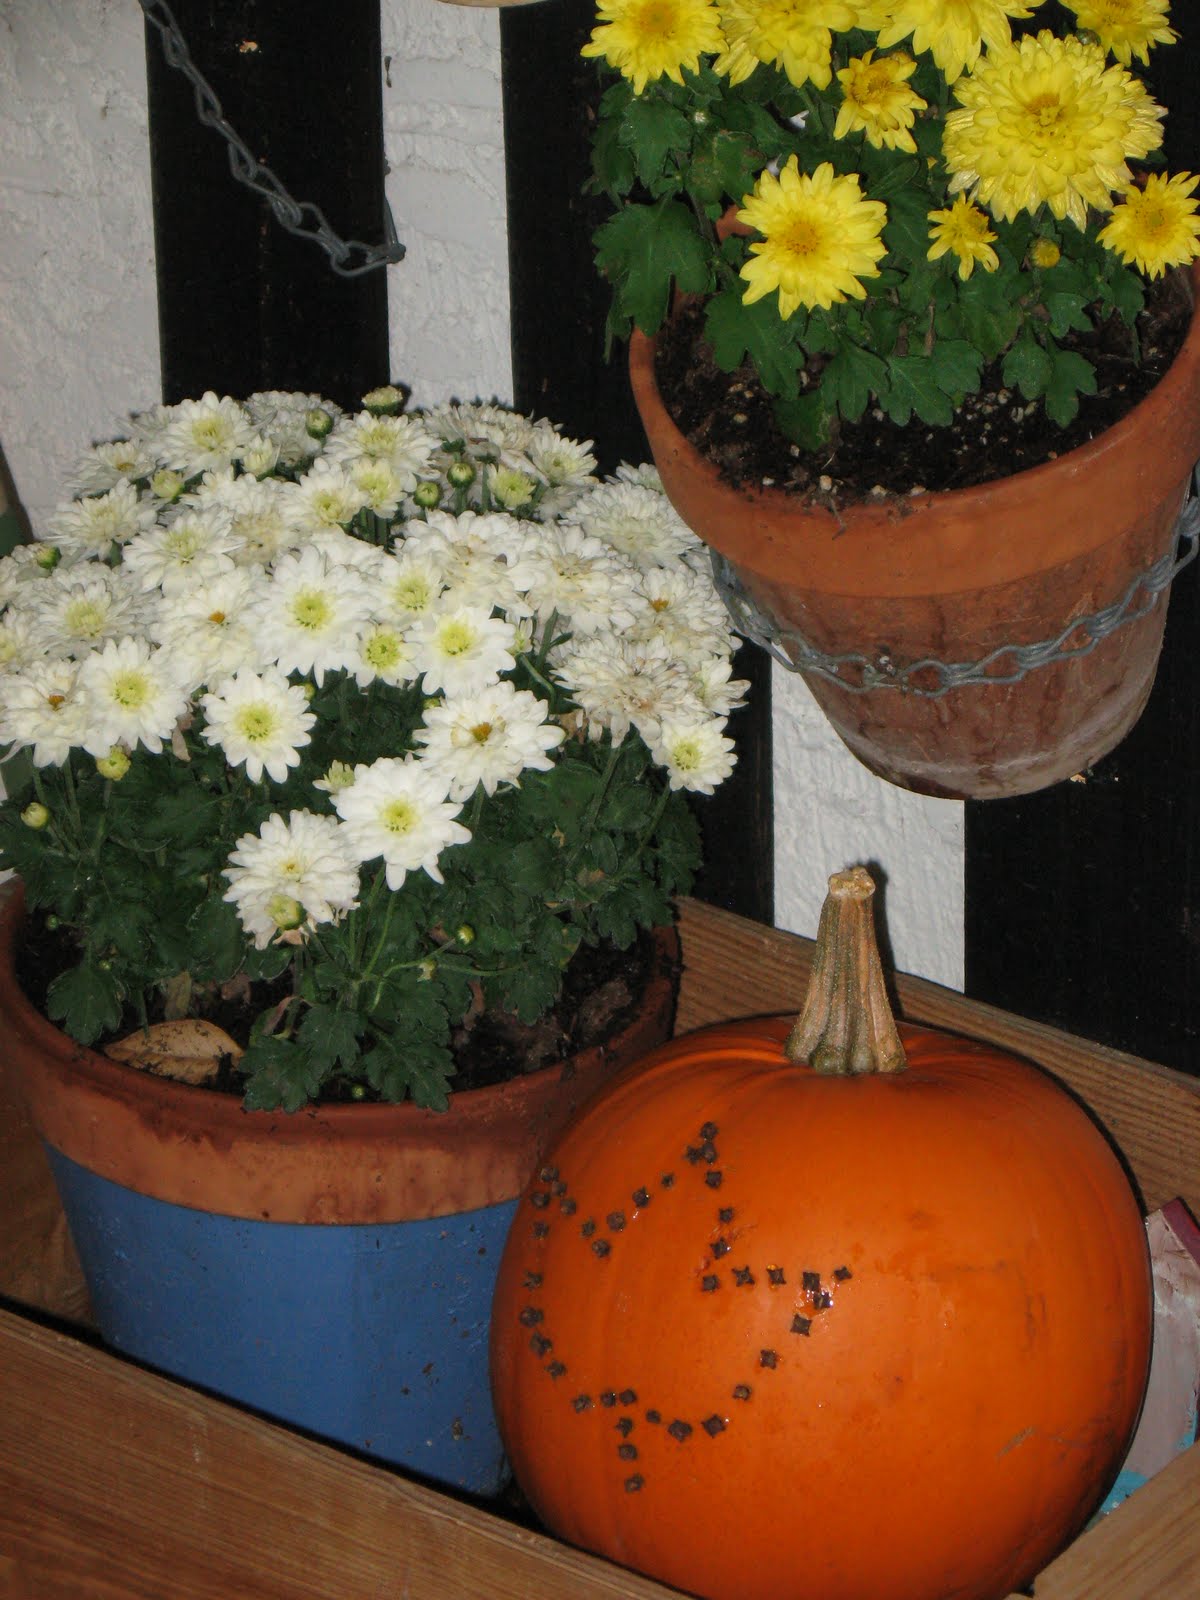
I saw this idea in a magazine a few years ago. But when I went to look for the actual instructions.... they were no where to be found. So I had to do the best I could with my memory.

Start with a pumpkin and some whole cloves. You will need a tool to poke holes in the outside of the pumpkin. I used a nut picker (you know the one that is used when you crack a nut and have to fish the flesh out.)


I just poked some holes in the shape of a leaf ( a little sad, I will admit, but it was my attempt at a leaf). Then I inserted the cloves into the holes.

That is it!


I set my pumpkin out on my front porch with my flowers. It creates a lovely spot of color.

Party- butterfly Pinata

A few year ago, my Beauty Girl wanted a pinata at her Birhtday Party. Well I just could not spend the money on the one she wanted ($18 plus). I thought, I can make that!

Well I did make it and it was perfect!


The girls loved swinging at the thing and had a grand time diving after the candy as it fell!

There is a word of caution to this tale. Unless the Pinata needs to match your birthday theme exactly, it would have been better to just buy the thing! The supplies were cheep, but the labor was intensive! The moral of this tale is Lots of time, no money...This is the answer! No time, some money... Just buy it!

Lets Play House


OK... It is a little uncanny that one of my sisters and I are so similar. Well, here is yet another example of this! I had drawn up plans for a PVC play house for my Beauty Girl a few years ago. And what to my wondering eyes should appear but a completed project of a pvc house on HER blog! Anyway, it got me all inspired to actually put my plans into action. I did look at the plans she used, which were almost the same as mine, but I added a door to the front. (My Beauty Girl is a tad accident prone and would have tripped over the pvc pipe in the entrance.) And for the sides, I put in holes for windows. This is two fold, One there is better ventilation and the breezes do not tear apart the whole thing. Two, I can check up on play more easily. That is my job as the MOM.

I also recycled! I used left over pvc from my Dad and used old sheets that were going to be donated. But viola, I found a use for them. I attached hook and loop (Velcro) to the walls and sides for easy removal of the walls. This is an outside thing you know (but it is under the back porch). For the top, I used a queen sized fitted sheet. I just popped it on and there it is! I did have to buy the connection pieces and one more piece of pipe. I think I spent around $15-$20.

We did put a few other things in there. An old spool for wire was painted pink and is now a table. There is a tin mail box (painted pink) outside the door. Also, an indoor-outdoor rug is under the house. That is just to make it a little nicer for my Beauty Girl!
Take a look. Tell me what you think!

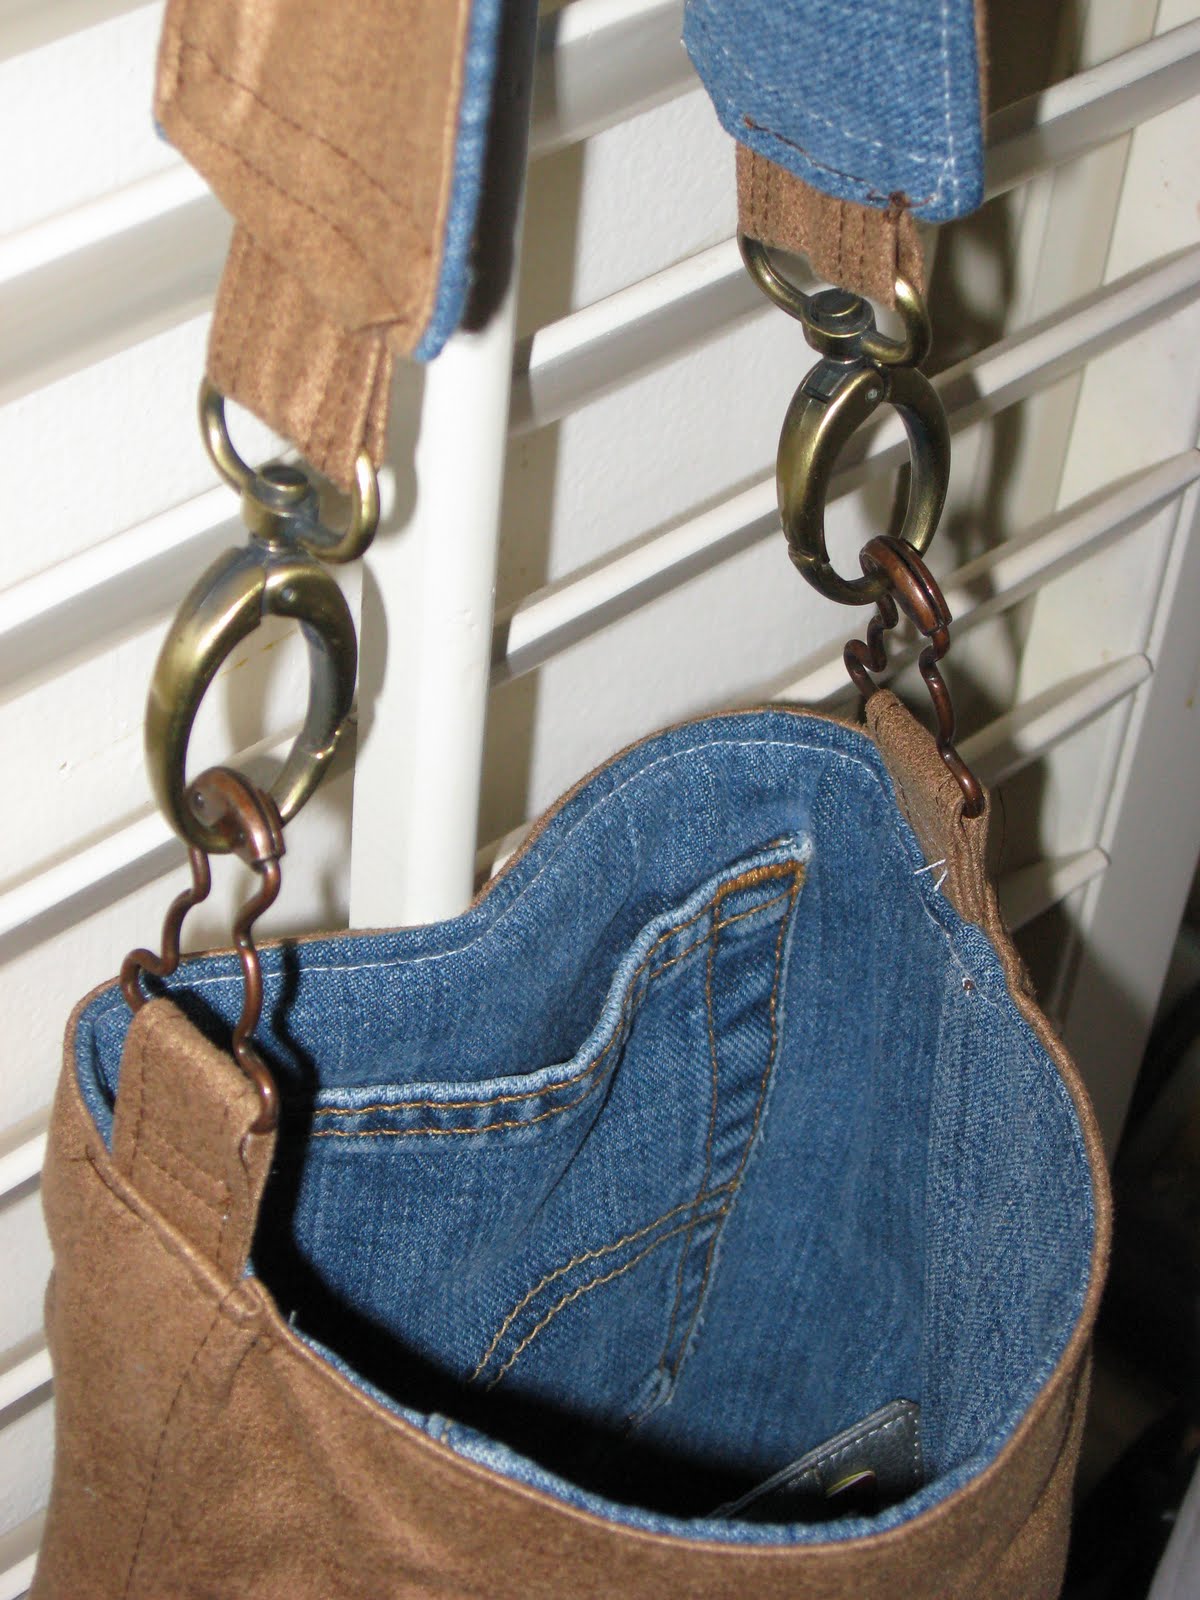
Purse from scratch

Here is my newest purse- from scratch.


I used some leather like material I got several years ago (and never used) for the outside. The inside is made from the pants pocked of an old pair of jeans. For the flower, I cut circular shapes with indentations. Then I burned the edges to give it a darker brown trim. The hardware are clasps from a pair of overalls and the hooks of a worn out purse.


The Peacock on the front was a broken broach that I sewed on.


This has turned out to be a great little purse.

Pottery- Date night

I decided that for date night we needed to do something DIFFERENT! I found this pottery class on a Saturday night and you were to bring a DATE. So I signed up me and my man! We had so much fun. My man was really frustrated at first because the wheel flung mud all over his nice black pants. But, since he was already dirty, he really got into it! He made 3 items that were keepers (and two more that broke apart on the wheel). I only made two items (plus one that did not survive the wheel) So we got a total of 5 pottery items.
Here they are. I put decorations on my two projects,
a dragonfly and flowers. The others were painted solid colors.
I highly recommend this to anyone. We really had a good time. And it was outside of the norm!

Tiffy's Living Room -REDO-

Before - Tiffy's living room.AFTER---TA DA!!!
I painted the walls a lovely chocolate brown with a green stripe.
We found a bunch of picture frames Tiff already had and painted all of them silver to create a collection. We then put baby pictures of each family member in the frames and mounted them along with the silver mirror (which she previously had hanging over the fire place.
Tiff added brown ribbon to the green pillows which helps tie things together. Tiffy had purchased the new sectional before we started to tackle the room, so since we were changing things up anyway, why not go all out.
We decided to use the old entertainment center (which was still quite nice) as a sofa back table.
We also hung a curtain that really accentuated the colors in the room.
We relocated the TV to over the fire place. But before we could put it on top of the mantel, I had to extend the mantel to make it big enough to mount the TV. (Yes I did mount the TV! It is bolted to the mantel)

There are still a few things we are working on. The new entertainment center needs legs and grout on the new tile top. Were are still getting a cord organizer for all of the unsightly electrical. But overall, the room has a new appeal. It is quite inviting and very functional.